|
|
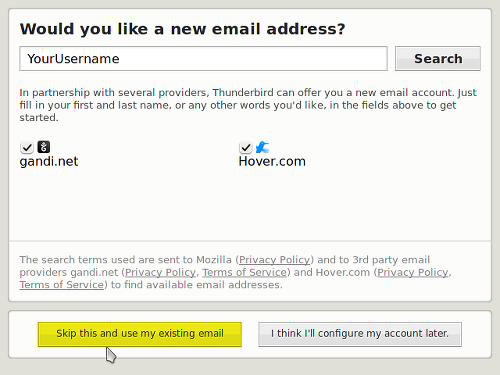
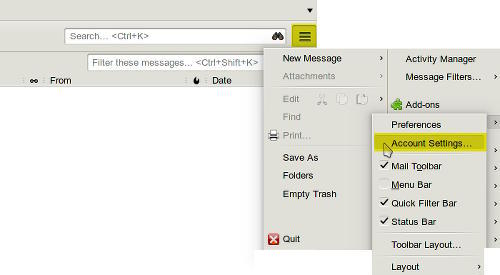
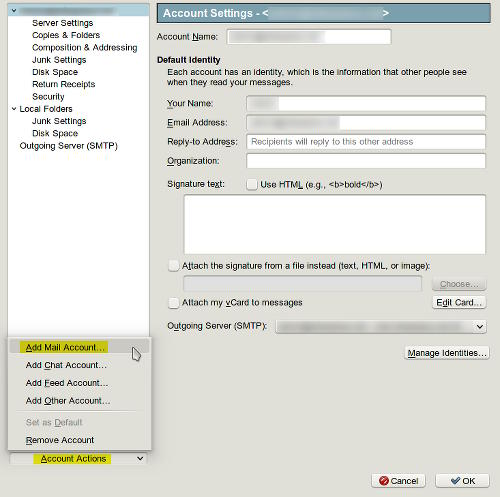
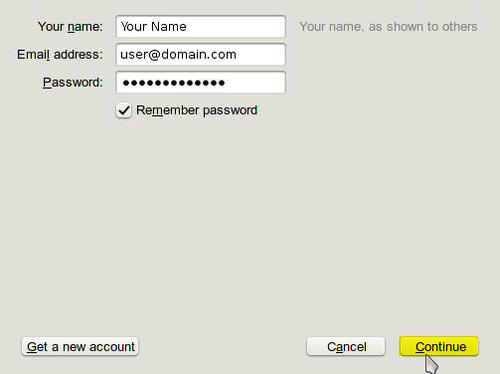
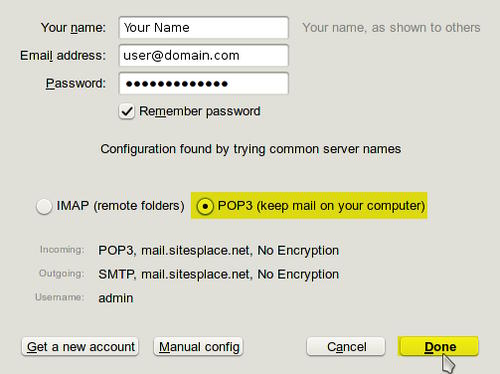
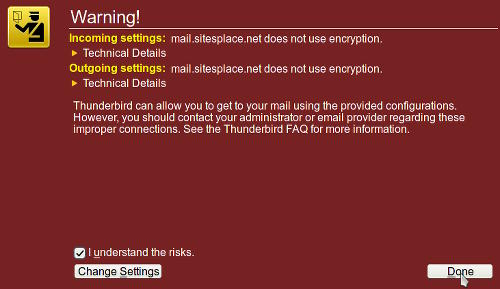
Setting Up Thunderbird 24.3.0 NOTE: This tutorial may work with newer versions of Thunderbird, but not older veresions. If you have an older version of Thunderbird (prior to November 2010), it is strongly advised you upgrade. If you are starting Thunderbird for the very first time, you will see the screen below. Click on the button to skip this step (We've highlighted this button in yellow.) After clicking on that button, skip the next two steps (in other words, don't go through the menu). If you already have email accounts in Thunderbird, you will need to set up another account. Go to the menu (shown as a 3-bar square in the upper right), select Preferences and then Account Settings: Next click on Account Actions drop down and select Add Mail Account... Now you will begin setting up your email account. First type in the name you want recipients to see when they get mail from you. For example, this could be your real name or "YourSite Webmaster". Then type in your full email address (For example: yourUser@yourDomain.com) and finally your email password. Click Continue. Thunderbird will find the domain's mail server and set it up for you. Please wait for Thunderbird to find the mail server and auto detect the settings. When done, you will be provided with two options: IMAP (default) and POP3. Be sure to click the radio button next to POP3. Click Done when finished. IMPORTANT NOTE: Thunderbird will often complain about encryption. This popup will look like the window below. This is not cause for concern and is normal. Click on the box I understand the risks on the lower left and then the Done button to finish the setup. Thunderbird is now ready to use with your new email account. Both POP3 (incoming mail) and SMTP (outgoing mail) are automatically configured by Thunderbird.
|