Setting Up SmartFTP 1.1
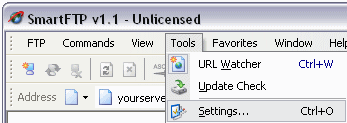
When you start SmartFTP for the first time, normally the settings page will
appear (if this is the case, proceed to Step 2). If the Settings page is not
shown, you can get there by clicking on the Tools Menu and selecting
Settings... or by pressing CTRL + O (not zero).
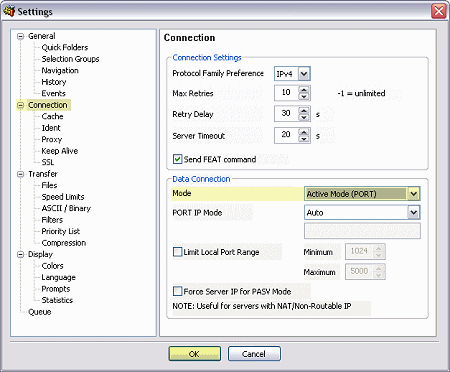
In the Settings window, click on Connections, which is the second category
on the left. In the Data Connection box on the bottom right, make sure
that the Mode is set to Active Mode (PORT). It is best not
to use Passive Mode with Active Web Hosting's FTP servers, especially if you
happen to be having problems uploading in that mode. Active Mode should always
work. Click the OK button when done.
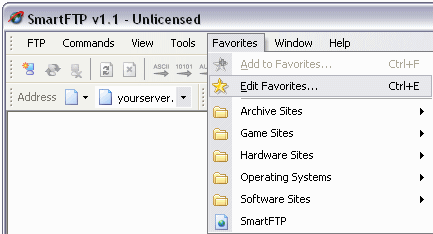
Go to the Favorites Menu and click on Edit Favorites... or use the
CTRL + E shortcut key combination.
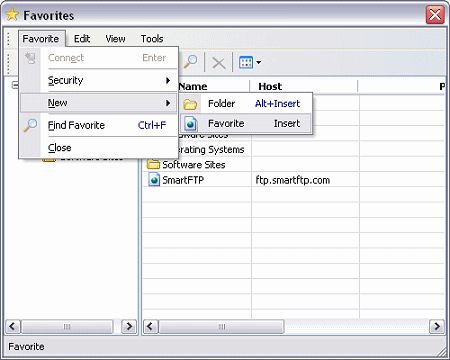
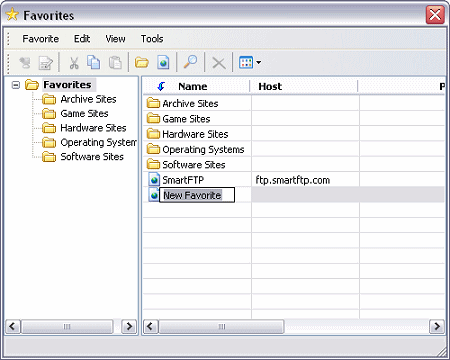
In the Favorites window, go to the Favorite Menu, select New
and then click on Favorite. A faster way would be to simply use the
Insert key.
A new favorite will be added and will be highlighted. Simply type in a
description for this connection such as "My Web Page" for example.
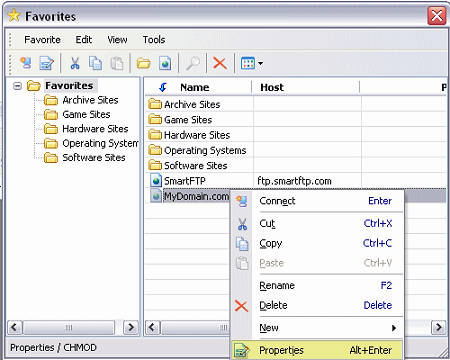
Right Click on your new connection name and select Properties...
In the Settings Window, click on the General category on the left. Leave
the Protocol at the default Normal FTP. For the Host, type
in ftp.yourdomain.com where yourdomain.com is your actual domain
name. Next, fill in your username, which again is your actual domain
name. Lastly, fill in your password. Do not click the OK Button
just yet. We have one last step to go.

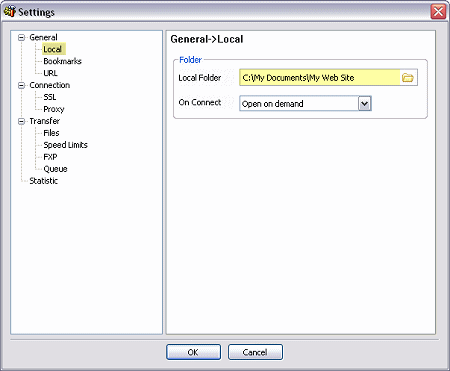
Under the General category on the left, click on Local. On the
right, click on the folder icon and browse to the folder on your hard drive
where you keep your web site files. This way, whenever you connect to your web
space, you will be automatically shown your files on your hard drive as well.
Transferring Files In SmartFTP:
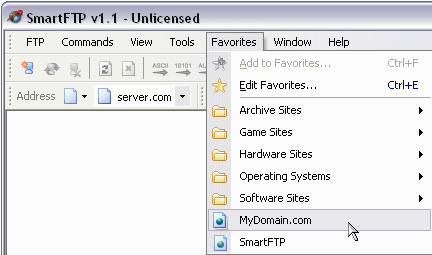
From the Favorites Menu, click on your new connection name. This will
connect you to your web space on Active Web Hosting's server.
You will now need to see your local hard drive folder to transfer files. From
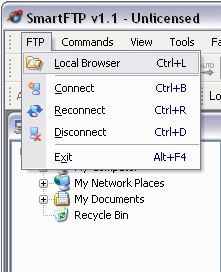
the FTP Menu, click on Local Browser. Or you can simply use the
CTRL + L shortcut key.
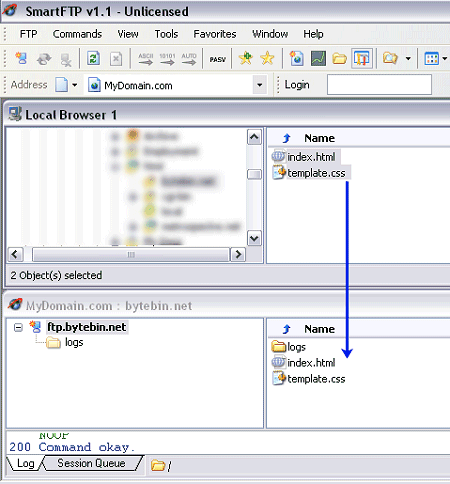
Select the files and folders you wish to transfer. Hold down the CTRL key
and click to select more than one file. Simply drag and drop the files into your
web space server window as shown below. The web space window will show
ftp.yourdomain.com where yourdomain.com represents your domain name.
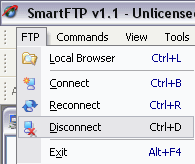
When you are done, it's always best to disconnect from the server before exiting
the FTP program. From the FTP Menu, select Disconnect.
Using Other FTP Commands:
Changing Folders: If you wish to transfer files to another folder in your
web space, double-click on the folder in the web space window.
Deleting Files: To delete a file, right click on the file and select
Delete... or press the Delete key.
Renaming Files: To rename a file, right click on the file and select
Rename or press the F2 key.
Creating A New Folder: Right Click in the web space window and select
New... and then click on Folder, or press the Insert key on
your keyboard. Type in a new name for the folder.
To Change File Permissions or use CHMOD: If you are installing a file that
requires certain permissions to be set, right click on the file to change and
select Properties/CHMOD or press the F7 key.
|
